- de
- en
You are here: aktuelles » en » macos8021xstepbystep
En:macos8021xstepbystep
Table of Contents
Step by step guide for the 802.1X WiFi on MacOS
Remove any existing 802.1X (GSG) profiles
To ensure a clean installation, make sure to remove any existing old copies of our profile.
Click here to learn how
1: Download the profile
In order to use the wifi at our building, you will need to download the profile first. Please select the matching type of profile (pick the first one if unsure):
| Apple Configuration Profile for Computer Science Accounts: | 802.1X-ifi.mobileconfig |
|---|---|
| Apple Configuration Profile for the alternate WiFi Authentification: | 802.1X-ifi-altwifi.mobileconfig |
| Apple Configuration Profile for b-it accounts: | 802.1X-bit.mobileconfig |
2: Begin the installation process
Now, locate the downloaded file and double click it to start the installation process.
You should see a notification pop up on your screen.
3: Installing the profile
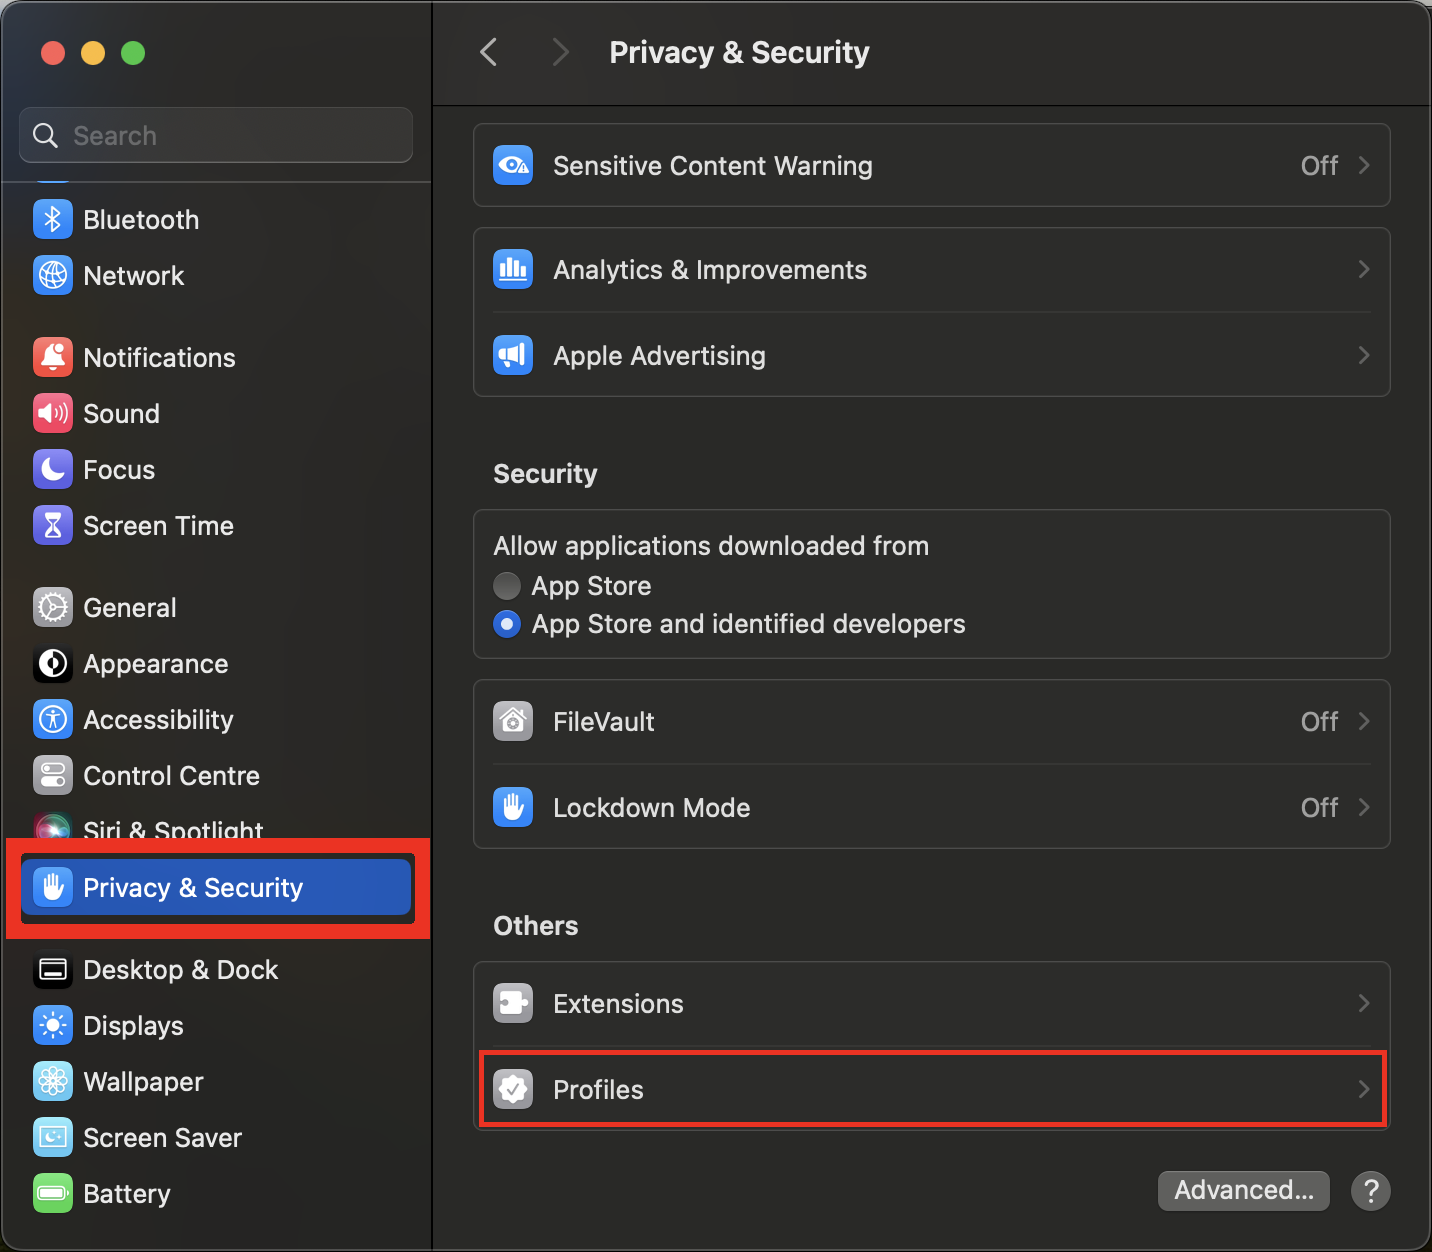
Next, open the System Settings App and navigate to Privacy & Security.
Select Privacy & Security and scroll down in the right-hand pane all the way to the bottom, to the option called Profiles.
Click it.
3.1: Find the correct profile
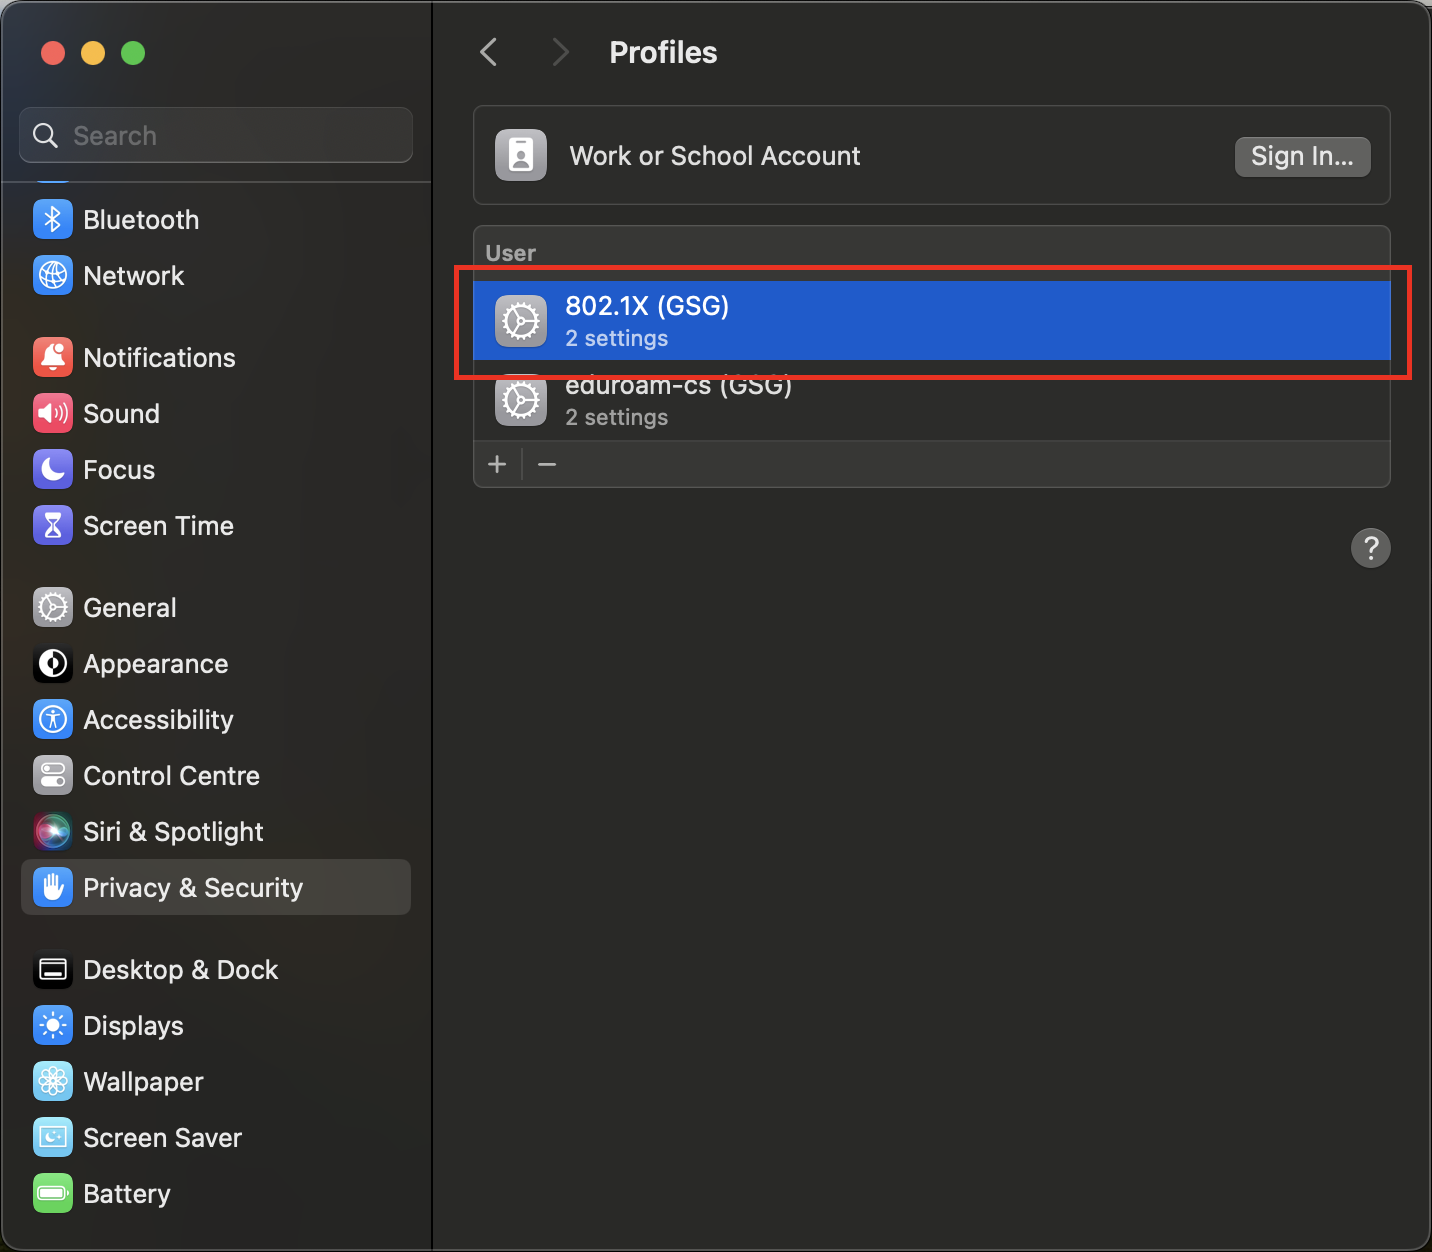
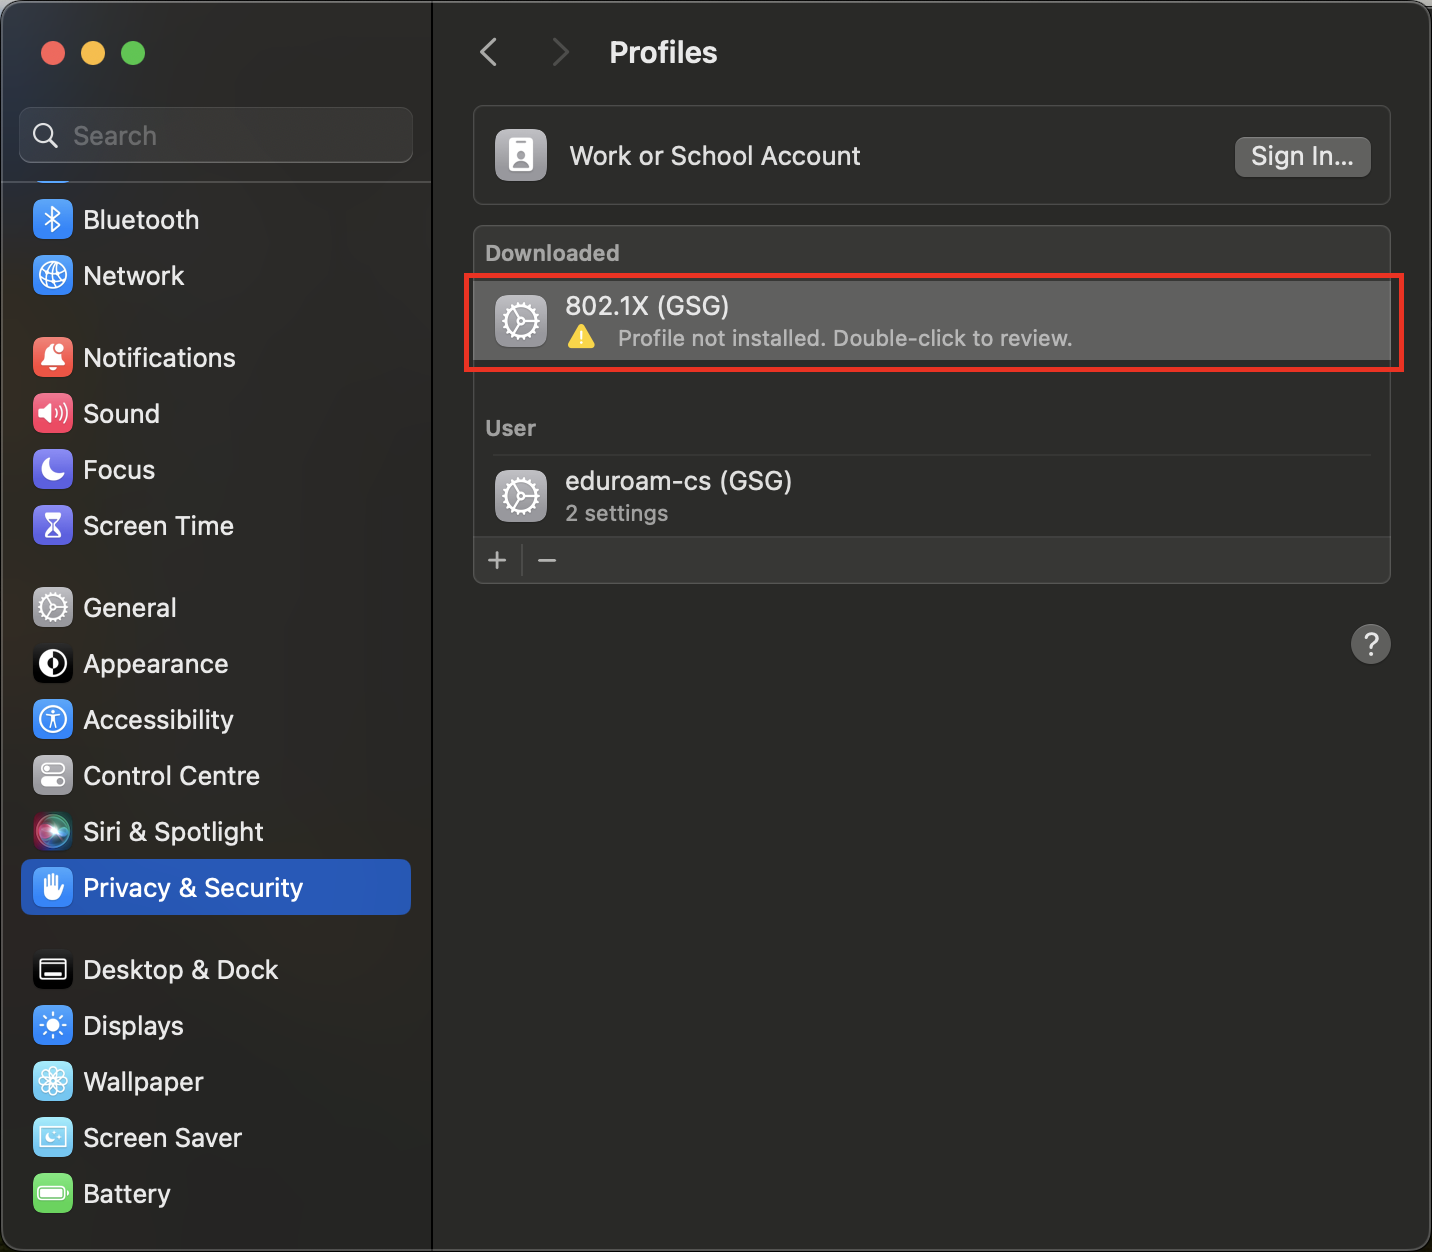
You should now see all the profiles installed on your machine, as well as the ones still pending.
Locate the one named 802.1X (GSG). It should have a warning sign informing you that this profile is not yet installed and needs to be reviewed first.
Double click the 802.1X (GSG) profile.
3.2: Review the profile
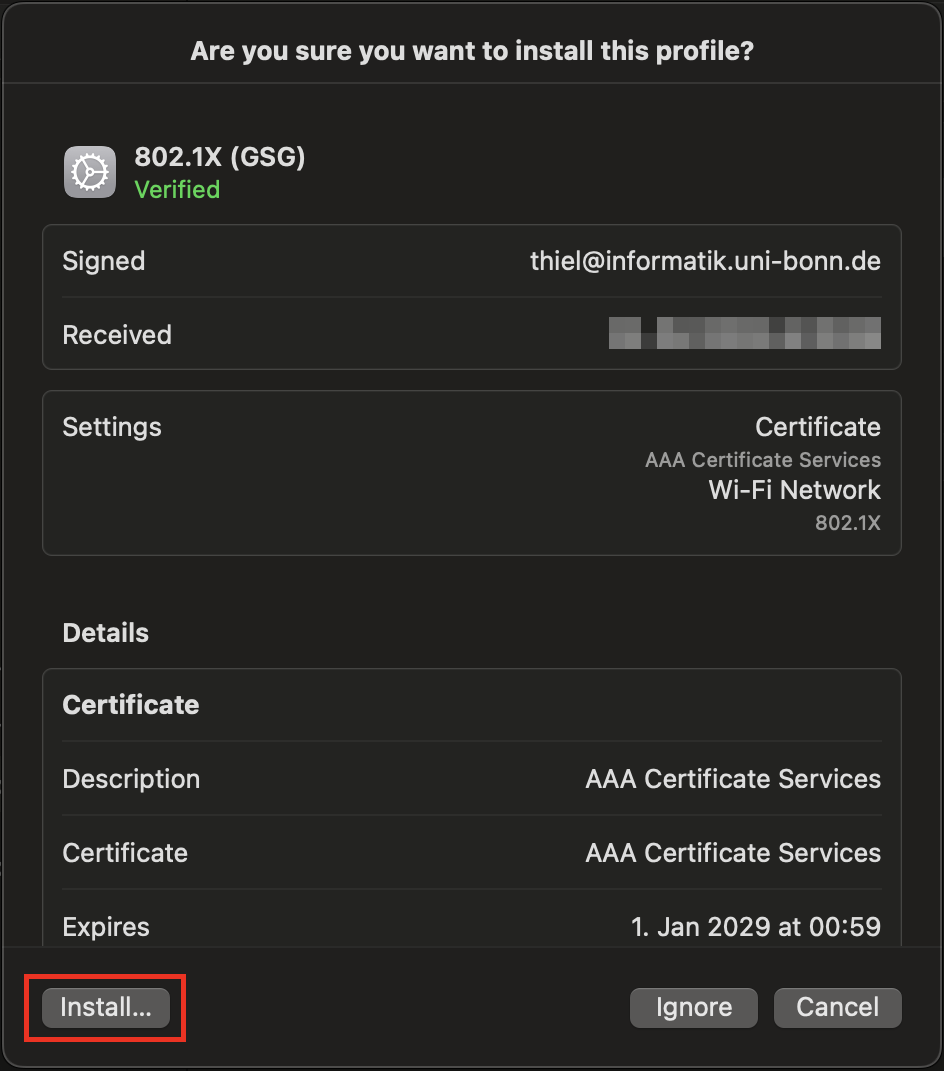
You will be asked to review the the profile now.
After ensuring the profile is correct, click the Install… button.
3.3: Confirm the profile
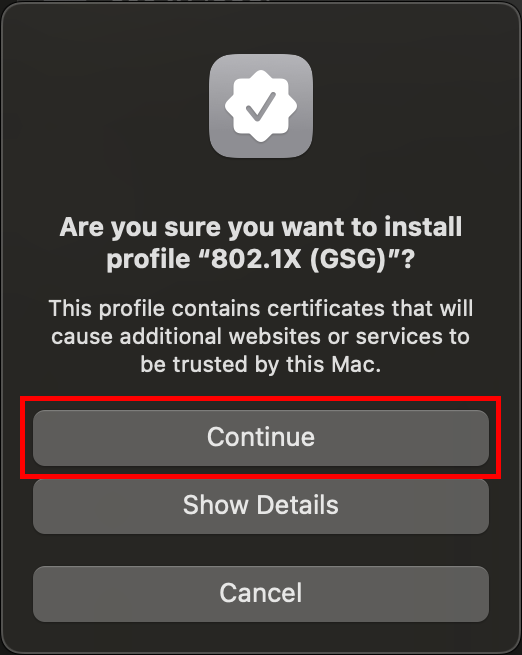
You will now be asked if you really want to trust the profile and the embedded certificates.
Press Continue
3.4: Username and password
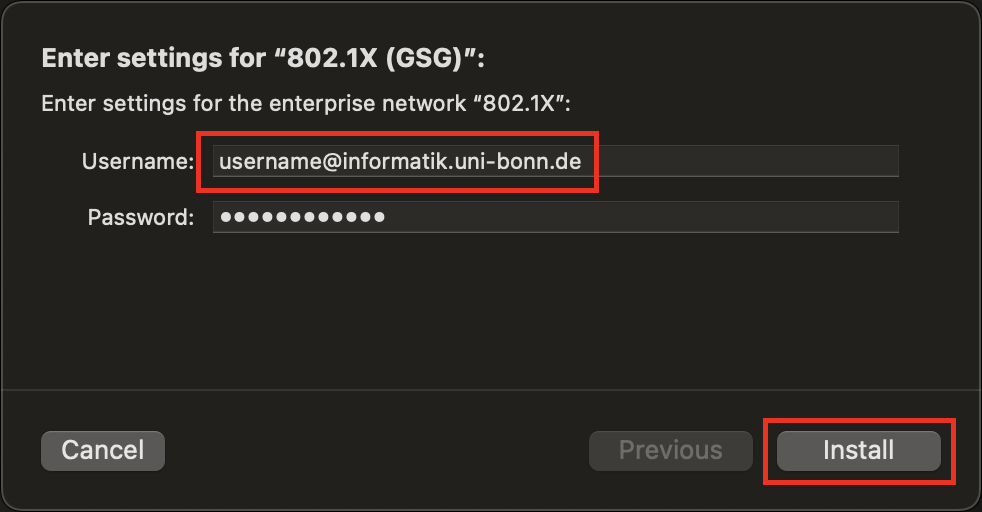
The profile will now ask for your username and password.
Make sure to use username@informatik.uni-bonn.de as the username. Do not omit the @informatik.uni-bonn.de part!!
The profile only works with your CS account, do not use @bit.uni-bonn.de !
And of course, substitute username with your actual username.
Then click Install.
3.5: Confirm the installation
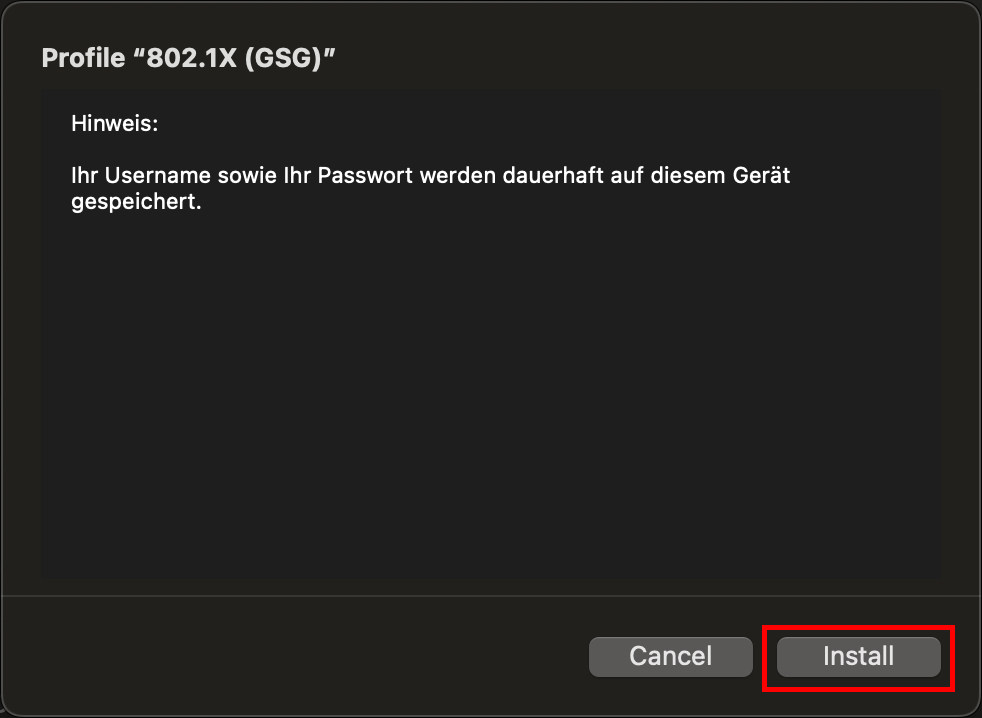
You will then be informed, that your username and password will be permanently stored on the device.
Click Install to confirm.
3.6: Finalize the installation
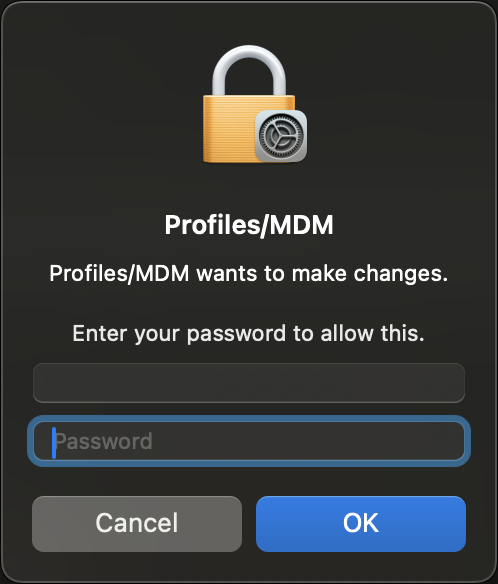
You will now be asked for your Mac's username and password (or Touch ID) to finish the installation of the profile.
